Monday, May 14, 2012

Organising my card and paper stocks

Who knew I had so much card.

As I was getting back into card making and I am getting a Sizzix Big Shot for my birthday I decided that I needed a more organised way of getting to my card and paper stocks than before....


Yikes.

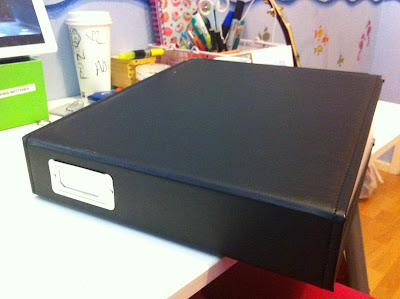
So I went on a hunt to the Range in Aldershot (my latest den of all things crafty) and while perusing the craft section (one bit of it anyway), I found this:


Perfect. Absolutely bloody perfect. Its actually by Papermania (a supplier of many very pretty cards/papers, toppers etc) and is 12x12 inches (well, thats the size paper/card that it fits in the pockets anyway). The folder itself is probably bigger than that. I bought that and an extra wallet of folders. Going through all my card, I decided that I'd like it in the order of the rainbow. I mean, why not? If you're gonna organise colours, what better way to do it. I had to go on Google to check what order that actually was!!! This is the picture I worked from:

source
So here are my organised pages. I love it. It made me feel all happy inside (sad, I know)!!!


How to get organised when you're depressed

I'm writing this as a kind of reminder to myself as I'm suffering slightly at the moment. I'm not going to pretend to be a doctor or to know what anyone else is going through or should do when they are depressed. I can only speak from my own experience.

Sometimes when you are depressed its hard enough to get up let alone get things done. However, if you really feel like you need to do some things for your own peace of mind (lets face it there is only so long that you can go without clean clothes or dishes before something needs to be done). My advise would be:
  • be selective. only do what really needs doing
  • do a little at a time
  • focus on one thing at a time
  • take regular breaks. Do 2-5 minutes of organising/housework/whatever, at a time and then rest for as long as you need to. 
  • be proud of what you accomplish. Even if its a tiny fraction of what you would be able to accomplish if you were well. 
I'm gonna end this post here as I'm tired just from writing this! Take it easy!

Monday, May 7, 2012

Projects Board

While perusing my RSS blog app on my iphone, I found this post and it inspired me into a 10 minute project to distract me from what I was REALLY meant to be doing.

I have tried several to do systems both technological and physical (chores charts and suchlike) but no matter how pretty and functional they are I never manage to stick to them for very long. The joy of this one was that its purpose is purely to focus the mind on the (craft/organisation etc) projects on the go or that I plan to start on next.

I also love that its located in my "office" and so its my domain and so if I wanted to stick it straight onto the wall with doublesided sticky tape (and I did want to - husband will gasp with horror) I could (and I did).

I started sticking double-sided sticky tape to the pegs (and then cutting the tape off at the edge), then sticking the pretty retro ribbon onto the pegs. Then I found the paper that I wanted to use as the background. Then decided that it would look nice framed, so cut down the first sheet so it could sit nicely on top (and inside) the 2nd sheet of decorative paper. I put the label together with glitter sticker letters that I bought for my chores chart that I put together recently and stuck it all together with doublesided sticky tape (got to love that stuff). I used black card that I had lying around to create the little cards that are to hold my "projects" and I wrote the names of a couple of projects using my white wet erase chalk pen.

See below for the finished product. I LOVE LOVE LOVE it!!!


Wednesday, May 2, 2012

Anna's Playroom

A few weeks ago I helped my friend Anna to tidy up her playroom. It was my first job as a professional organiser (although I wasn't charging her as I need to gain experience).

Anna's issue was that she had a toy room (used to be a dining room) which was just completely overloaded. There were too many toys. Some toys that were not appropriate for her sons' ages, some were rubbish (broken toys, papers and artwork that was not worth keeping), and many duplicates of the same thing. Here are the before pictures:


I took with me several large plastic boxes, black bin liners, post it notes and a marker pen.

We started by clearing the area by the window of toys one by one and deciding which of the following categories it was:
  1. Keep
  2. Bin
  3. Sell
  4. Donate
In the space of 2 hours, we filled up an entire bin bag of rubbish, 3 boxes of stuff to sell and a few items that were not worth selling (my kids are currently making use of them at the moment).

Once we'd finished with the corner by the window, we also tackled the cupboard to the left of the door.

Here are the after photos:


This is all the stuff I took away to sell on Anna's behalf. So far I have made over £36 - £7 commission for me (20% I'm charging this time), and over £28 for Anna. I am tracking all the items and sales in a spreadsheet (of course) ;) .


There are some areas that we didn't quite get to in the 2 hours we had spare (I also had my 20 month old daughter with me "helping") so I do plan on going back at some point (as soon as other commitments, namely my Java course, are over). We didn't have time to tackle the table area or the bookshelf above it (or the lower bookshelve corner either):


If you would like me to come and help you declutter a room, cupboard, area (no job too big or small), let me know. Lets look at the before and after photos again:

BEFORE

AFTER


Dumping ground box


My friend Melissa asked me if I could find a solution to her problem.

She has an area where everything - her keys, work card, purse (by that I mean the thing we girls keep our money in, not the American meaning of purse, which is the English handbag), and other bits and bobs - get dumped when she gets home.

See before pictures of the area and the things that she was looking to find a home for:


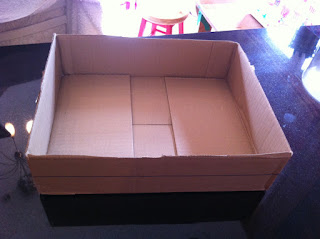
I had an idea in my head of what I would make and then I found this box:


Its just a packaging box (probably from Amazon) and I cut off the flaps as you can see above. I used some of the flaps to cut up dividers:


Then I set about finding nice paper to cover it. 

This is what I finished up with:


This is how it looks in its rightful place.  She is a very happy bunny.


 If you would like me to make you a purpose built box for whatever purpose, please contact me.